

Foundation Friday: Pada Bandha

This post is an instalment in a series that delves into the basics of yoga—looking at its postures (asana), breath (pranayama), philosophy, and all the other essentials—giving you the foundations upon which to build a solid practice. This post focuses on one of the "bandhas", or "locks"—in what might be our most literal "Foundation" Friday yet!
Foundation Friday: Pada Bandha
Lock, or Seal ("Bandha") Foot Lock, or “Pada Bandha” pah-dah bahn-dah

First off—what is a bandha?
The sanskrit word "bandha" translates to lock, seal, or closure. During asana (postural) or pranayama (breath work) practice, bandhas help to energetically "lock" in energy and prana (life force), consciously sealing it inside of our bodies so that it can aid us in our practice. There are three main internal bandhas, one "mother" bandha, and two stabilizing, grounding bandhas—pada bandha, as we'll look at today, is of the stabilizing, foundational variety.
What then, is pada bandha?
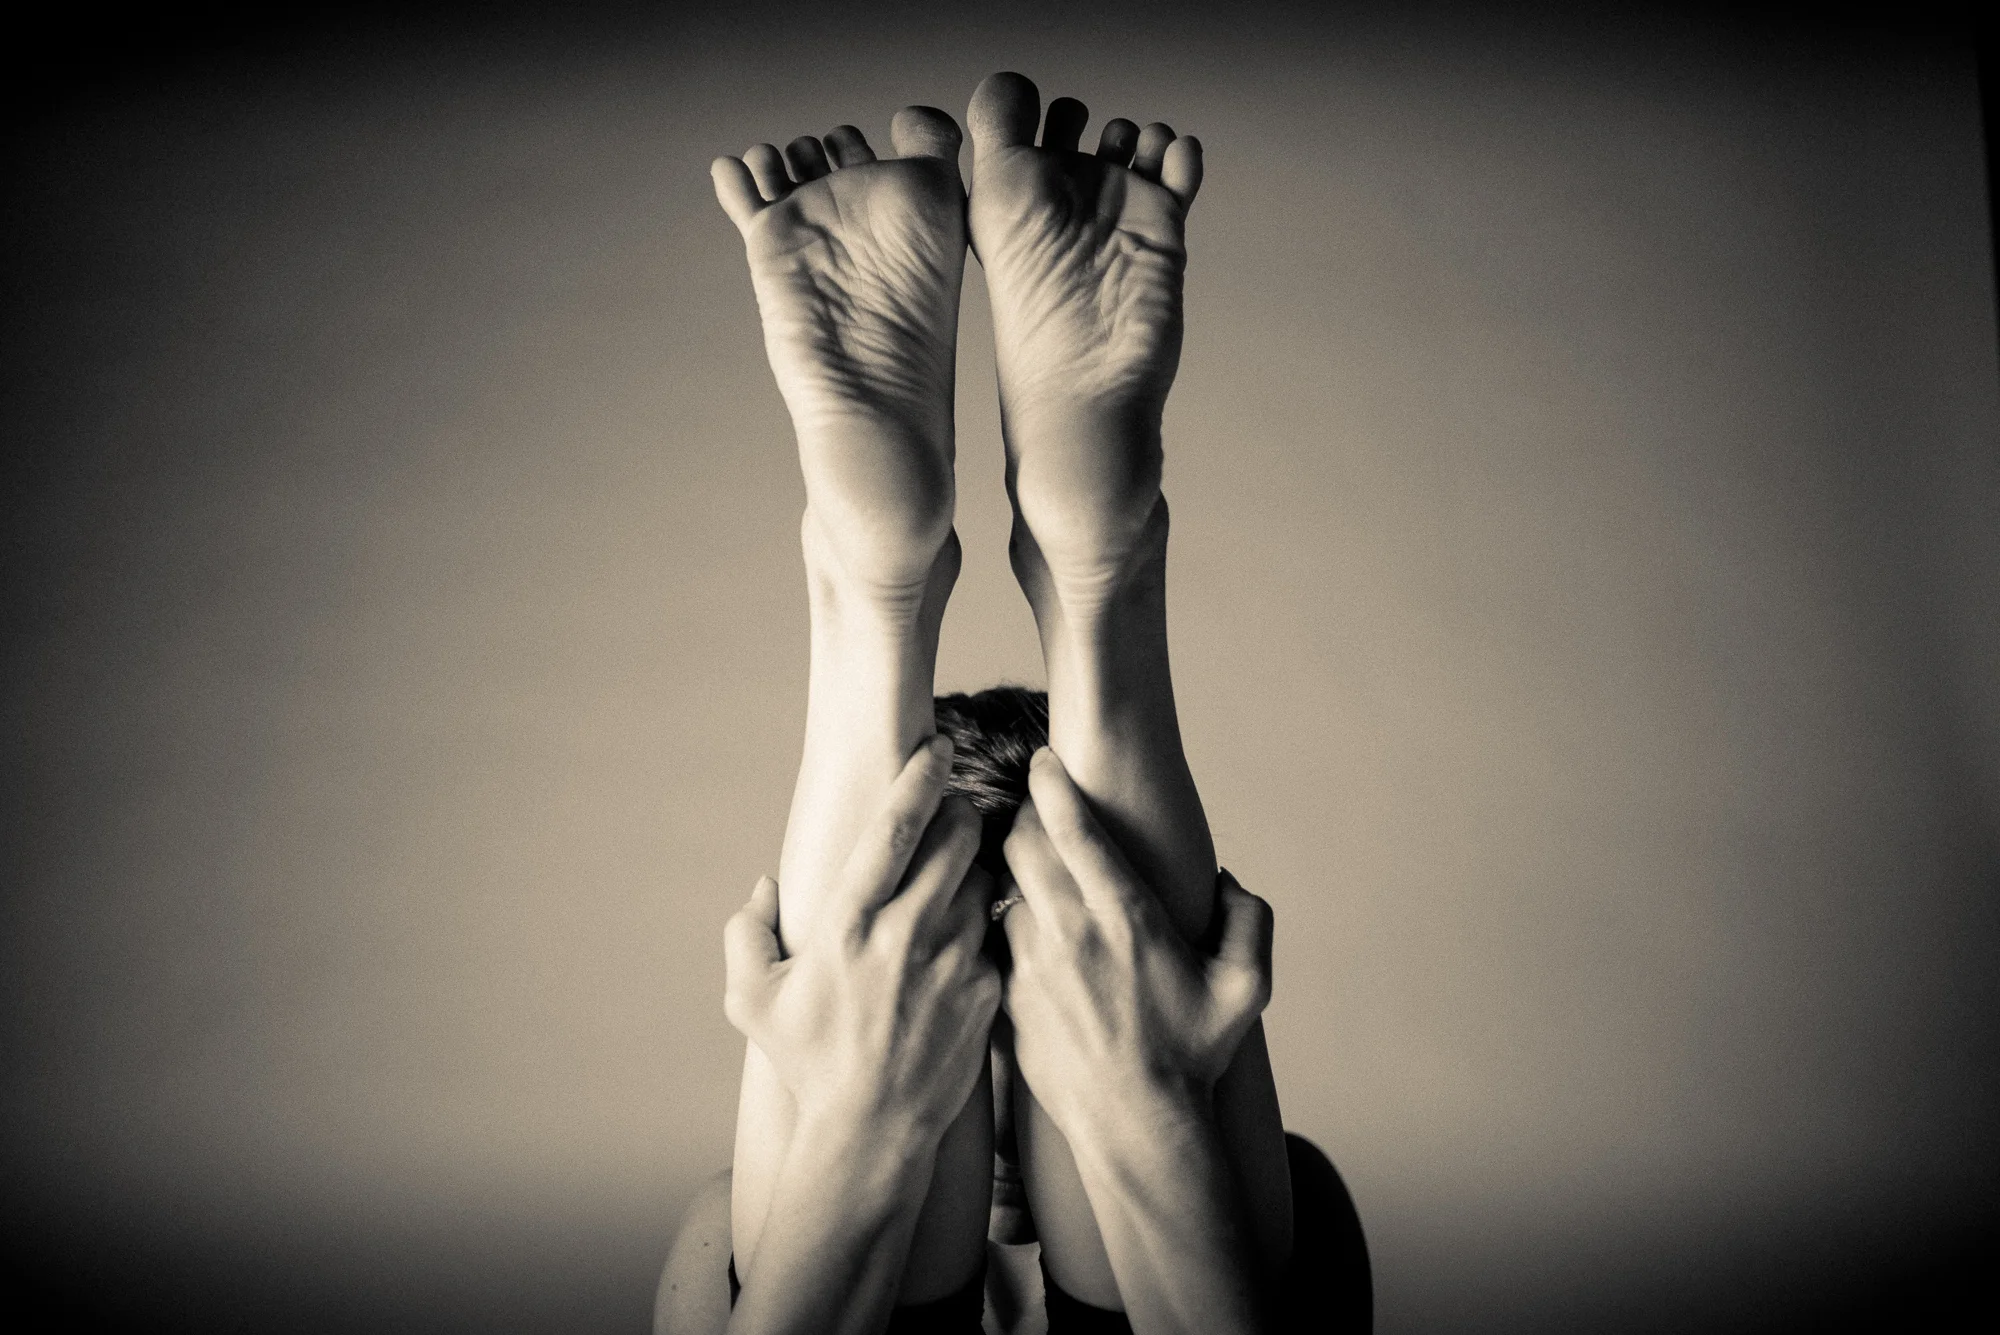
Pada, in sanskrit, means "foot"—so pada bandha, is then a "foot lock," or "foot seal." It is a sealing of your connection—or a rooting—with the earth beneath you. It is a solid foundation upon which you can balance. It's a way to get acquainted with all the tiny, underused muscles in your feet (all twenty of them!).
Pada bandha may help…
- You to feel more energized by "locking" your energy in
- Give a sensation of "grounding" while simultaneously lifting (may aid in anxiety or depression)
- Protect your knees
- Support your balance
- Alleviate problems with fallen arches
- Strengthen your legs
- Activate mula bandha (more on that to come!)

So, how do I get there?
- Take a good look at the bottom of your foot.... get really up close and personal! Notice its curvatures, and its raised and recessed areas. Thank them for all the work they do—these feet are what support you, day in and day out!
- Find the four corners of the sole of one foot—the mound of your big toe and pinky toe, and your inner and outer heel. From standing, place your foot down on an even surface and press each of those four corners down evenly.
- Pick up all five of your toes and spread them away from your foot and as far apart from each other as you can.
- While still pressing down through your "four corners," and with your toes lifted, draw, or squeeze the ball of your big toe mound towards your inner heel, and your inner heel towards the mound of your big toe in a way that lifts your arch. Without releasing through the inner edge, do the same with the mound of your pinky toe, and your outer heel. Perhaps you might notice your ankle lift slightly, or feel like you can draw the strength of your feet up your whole leg.
- Keeping all of the engagement you found in Step 4, place your toes back down—one at a time if you can—still spread widely, almost as if you had webbed feet, or spacers in between your toes (this is what we like to call "yogi toes!").
- Do the same with your other foot.
We hope this helps you better understand the concept of pada bandha. Please feel free to comment on our Facebook with any further questions. And let us know if you have something you would like to see featured in Foundation Friday!

Foundation Friday: Downward Facing Dog
This post is an instalment in a series that delves into the basics of yoga—looking at its postures (asana), breath (pranayama), philosophy, and all the other essentials—giving you the foundations upon which to build a solid practice. This post focuses on the ubiquitous downward facing dog.
Foundation Friday: Downward Facing Dog
Pose, or "Asana" Downward Facing Dog, or “Adho Mukha Svanasana” odd-oh mook-ah shvah-nass-ah-nah (not to be confused with savasana)

Why do we practice downward facing dog?
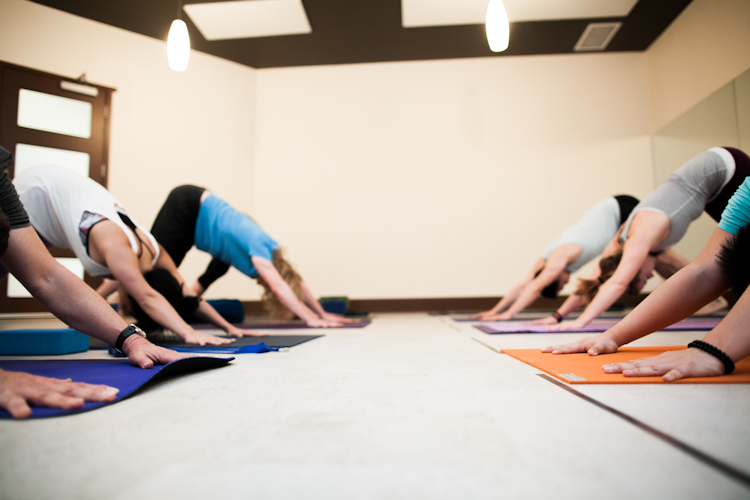
Downward dog is probably one of the most prevalent of all yoga postures. Though it may not feel like one when you first begin practicing, downward facing dog is actually a resting pose, and is often offered as a break between sequences, or as a starting and finishing point in a flow, or vinyasa. This pose will likely be taught in your first-ever beginner's class, and will carry you through as you advance your practice—downward dog is a quintessential pose, so it's important to get your alignment, er... down!
Downward dog may help…
- Calm the mind, relieving stress and mild depression
- Energize your body
- Stretch your shoulders, hamstrings, calves, arches, and hands
- Strengthen your arms and legs, which acclimatizing you to weight-bearing in your arms
- Improve digestion
- Offer relief for sinus pain, headaches, insomnia, back pain, and fatigue
- Ease conditions of menopause, high blood pressure, asthma, flat feet, and sciatica, and prevent osteoporosis
Traditional Chinese Medicine and acupuncture tend to favour Downward Facing Dog for its activation and extension of the Bladder Channel, the longest channel in the body. According to their perspective, elongating the spine throughout this posture aids in strengthening immunity, among a host of other benefits.

How do I get there?
- Start from a table top position, on your hands and knees. Place your hands slightly wider than shoulder distance apart and spread your fingers wide.
- Turn your hands so that the space between your pointer finger and your middle finger points to the top of your mat.
- Press down through the four corners of your hands, especially the mound of your thumb and pointer finger, while gripping your mat with your fingertips.
- Tuck your toes under, and press your hips up so that your body looks like an inverted pyramid from the side.
- Squeeze your forearms towards each other, and roll your upper arms away from each other.
- Ensuring your feet are hip-distance apart, take a soft bend into your knees and press your heart back towards your thighs.
- Roll your inner thighs back and wide behind you.
- Tilt your sitting bones skyward, and draw your tummy in towards your spine.
- Hug your shins towards each other, and press your heels down towards your mat (but it's okay if they don't touch!)
- Look between your feet, shins, thighs, or upwards at your belly.
If this position is uncomfortable, you can:
- Place your hands on blocks if your shoulders are quite tight
- Prop a towel, rolled mat, or some small sort of padding underneath your palms to alleviate pressure on your wrists
- Take a bigger bend into your knees if your legs are tight
- Support your head with a bolster or a block
- Or, start from standing with a wall or chair in front of you, then bend at your waist and press your palms into a wall or chair instead of the floor. Progress by walking your hands lower towards the earth as the posture becomes more accessible.
We hope this helps you better understand the concept of downward facing dog. Please feel free to comment on our Facebook with any further questions. And let us know if you have something you would like to see featured in Foundation Friday!

Foundation Friday: Drishti

 Zoran's drishti aids in his balance and concentration.
Foundation Friday: Drishti or Gazing Point
Drishti (meaning: "full seeing", vision, point of view, intelligence or wisdom)
Pratyahara: sense withdrawal
Dharana: concentration
drish-tee
"The eyes play a predominant part in the practice of asanas." - BKS Iyengar
Drishti, or focused gaze, is a means for developing concentrated intention. It relates to the fifth limb of yoga concerning sense withdrawal, as well as the sixth limb dharana relating to concentration. There are a total of 9 drishtis and each yoga asana is associated with one. There are many yoga systems that use this practice and differences regarding which are used for specific asanas, but drishti is mainly part of the Ashtanga Yoga, Hatha Yoga, Bhakti Yoga and Raja Yoga traditions.
Why do we practice drishti?
Focusing your gaze as specific points allows your concentration and intention to flow in a circular manner. The gaze first comes from within and is then directed outward to a specific point. This intense focus creates an energy that is reflected back into your body to hold your concentration. This allows the 'looking' to reflect inward, creating a withdrawal of the outward senses and a connection to Self. The directed gaze also gives the mind a focused visual stimulus; wherever your eyes go your mind will follow. Drishti allows the mind to be singularly focussed and balances our internal and external practice. In a visually addictive world, our attention is like currency. Spend it wisely!
Drishti may help...
- concentration
- inner connection
- posture alignment
- meditation
- cleansing the mind

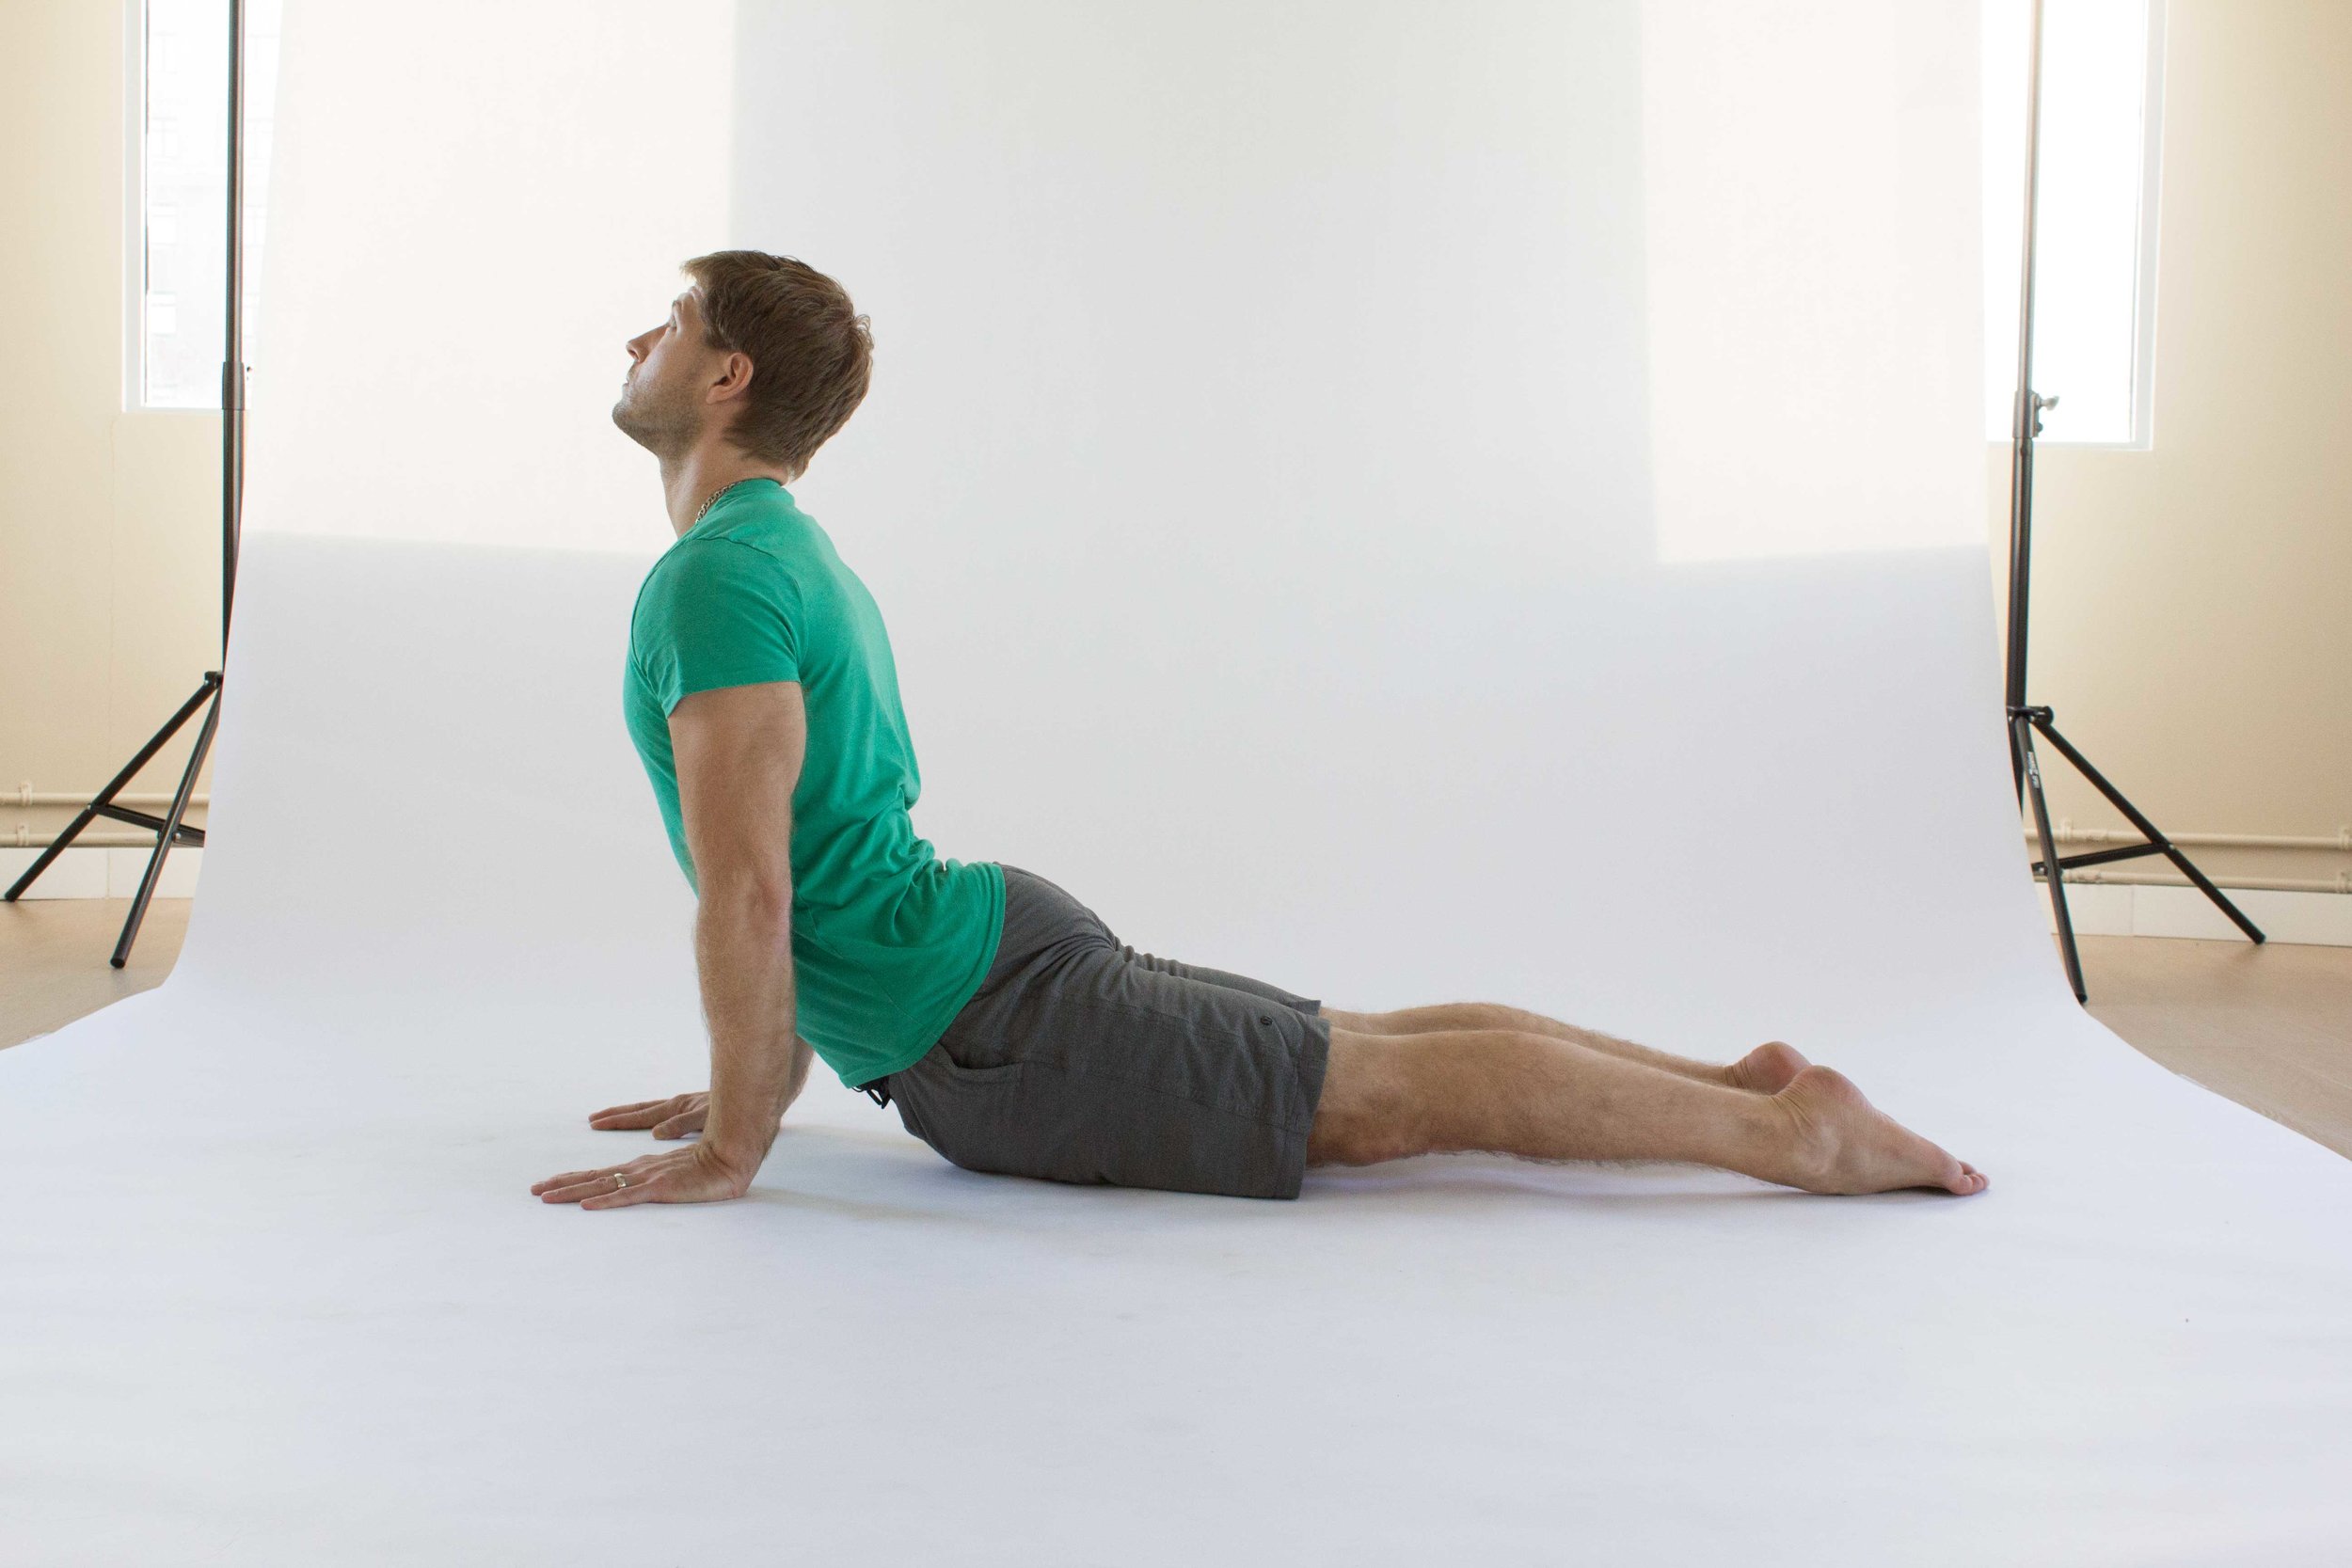
In Urdhva Mukha Svanasana (Upward-Facing Dog Pose), for instance, we gaze at the nose tip: Nasagrai Drishti. In meditation and in Matsyasana (Fish Pose), we gaze toward the Ajna Chakra, the third eye: Naitrayohmadya (also called Broomadhya) Drishti. In Adho Mukha Svanasana (Downward-Facing Dog Pose), we use Nabi Chakra Drishti, gazing at the navel. We use Hastagrai Drishti, gazing at the hand, in Trikonasana (Triangle Pose). In most seated forward bends, we gaze at the big toes: Pahayoragrai Drishti. When we twist to the left or right in seated spinal twists, we gaze as far as we can in the direction of the twist, using Parsva Drishti. In Urdhva Hastasana, the first movement of the Sun Salutation, we gaze up at the thumbs, using Angusta Ma Dyai Drishti. In Virabhadrasana I (Warrior Pose I), we use Urdhva Drishti, gazing up to infinity. In every asana, the prescribed drishti assists concentration, aids movement, and helps orient the pranic (energetic) body.
In some cases, an improper drishti can actually be harmful, like shoulderstand where the head should not turn to look left or right. Keep this in mind when working with drishti in your practice.
Let the drishti be your guide in to the unseen, to your source, your truth. Allow the flow of your gaze bring you into your true balance and nature.

Foundation Friday: Trikonasana


These Yogalifers are feeling the length in Louise McKinney Park!
Foundation Friday: Trikonasana || Triangle Pose
Utthita Trikonasana (extended triangle pose)
trikona: triangle asana: posture or seat
Ooh-tee-ta Trih-koh-nah-sah-nah
Trikonasana is one of those foundational poses that gets extra juicy with technical alignment and a longer hold. With that said, there are many ways and cues to get you into this pose, and as we always say, the best version is the one that feels the best. Strength and length are at the heart of triangle pose; feel grounded in your lower limbs and lengthened in your torso out to your fingertips.
Why do we practice Trikonasana?
Like Pranayama and meditation, we can think of our physical postures as medicine. Here are some of the benefits of triangle pose:
- improves the flexibility of the spine
- corrects alignment of the shoulders
- relieves backache
- soothes intestinal issues including gastritis, indigestion, acidity and flatulence
- massages and tones the pelvic organs
- corrects the effects of faulty posture and a sedentary lifestyle
- assists stiffness in the neck, shoulders and knees
- strengthens the ankles and tones the ligaments of the arms and legs
- improve appetite, digestion and circulation
- tone the spinal nerves and abdominal organs
- tone the reproductive organs
- stimulate the nervous system

How do we get there?
There's a lot going on in this pose: you are stretching your hamstrings and psoas, activating and lengthening the external and internal oblique muscles, and the aligning your shoulders as you engage and strengthen the rhomboids (those muscles between the scapulae). Not to mention all the internal medicine you're receiving simultaneously...!
So, from the ground up:
Turn your back toes to face the long edge of your mat, perhaps turning them in slightly depending on sensations in your knee.
The front foot is facing the short side of your mat.
You may use heel-to-arch alignment if it feels right or choose a wider stance based on what's right for your body.
Engage the inner thighs as if you're trying to bunch your mat in the middle.
Draw the pelvic floor up and simultaneously draw in and spin the bottom low belly toward the ceiling.
Spin the entire rib cage up as well.
Ideally, the hips are square to the long side of your mat, with the top hip point (the iliac crest) rolling up and open to the ceiling, the bottom hip rolling under. This will help to square the hips, but if the psoas is tight (and you may feel that tightness in the hamstrings, as the contraction of the psoas here draws on the hamstrings’ origin point), it may take time.
You can use a block under your hand and always remember to take a soft bend in your knees if that's what's feeling best. Never lock them out or hyper-extend!
Keep space in the lower-side oblique muscles so that you’re not collapsing through that lower side waist; keep it long and engaged. Think equal length in both sides of your waist, continuing with that length into your neck and right out your fingertips.
You may choose to gaze up to your top hand or simply look where it feels natural.
Keep your breath long and deep, pulling it in and expanding through the diaphragm to contract and tone your digestive organs and keep focus.
Be sure to come out of this pose on the inhale, engaging the abdominals to help you rise without stressing the lumbar spine. Choose muscle over momentum. Breathe. Switch sides!
Foundation Friday: Savasana

This post is the first in a new series that delves into the basics of yoga—looking at its postures (asana), breath (pranayama), philosophy, and all the other essentials—giving you the foundations upon which to build a solid practice. First off, we’ll be taking a look at the quintessential yoga asana, or pose—savasana.
Foundation Friday: Savasana
Asana
Corpse Pose, or “Savasana”
(sava=corpse, asana=pose)
sha-vass-a-na

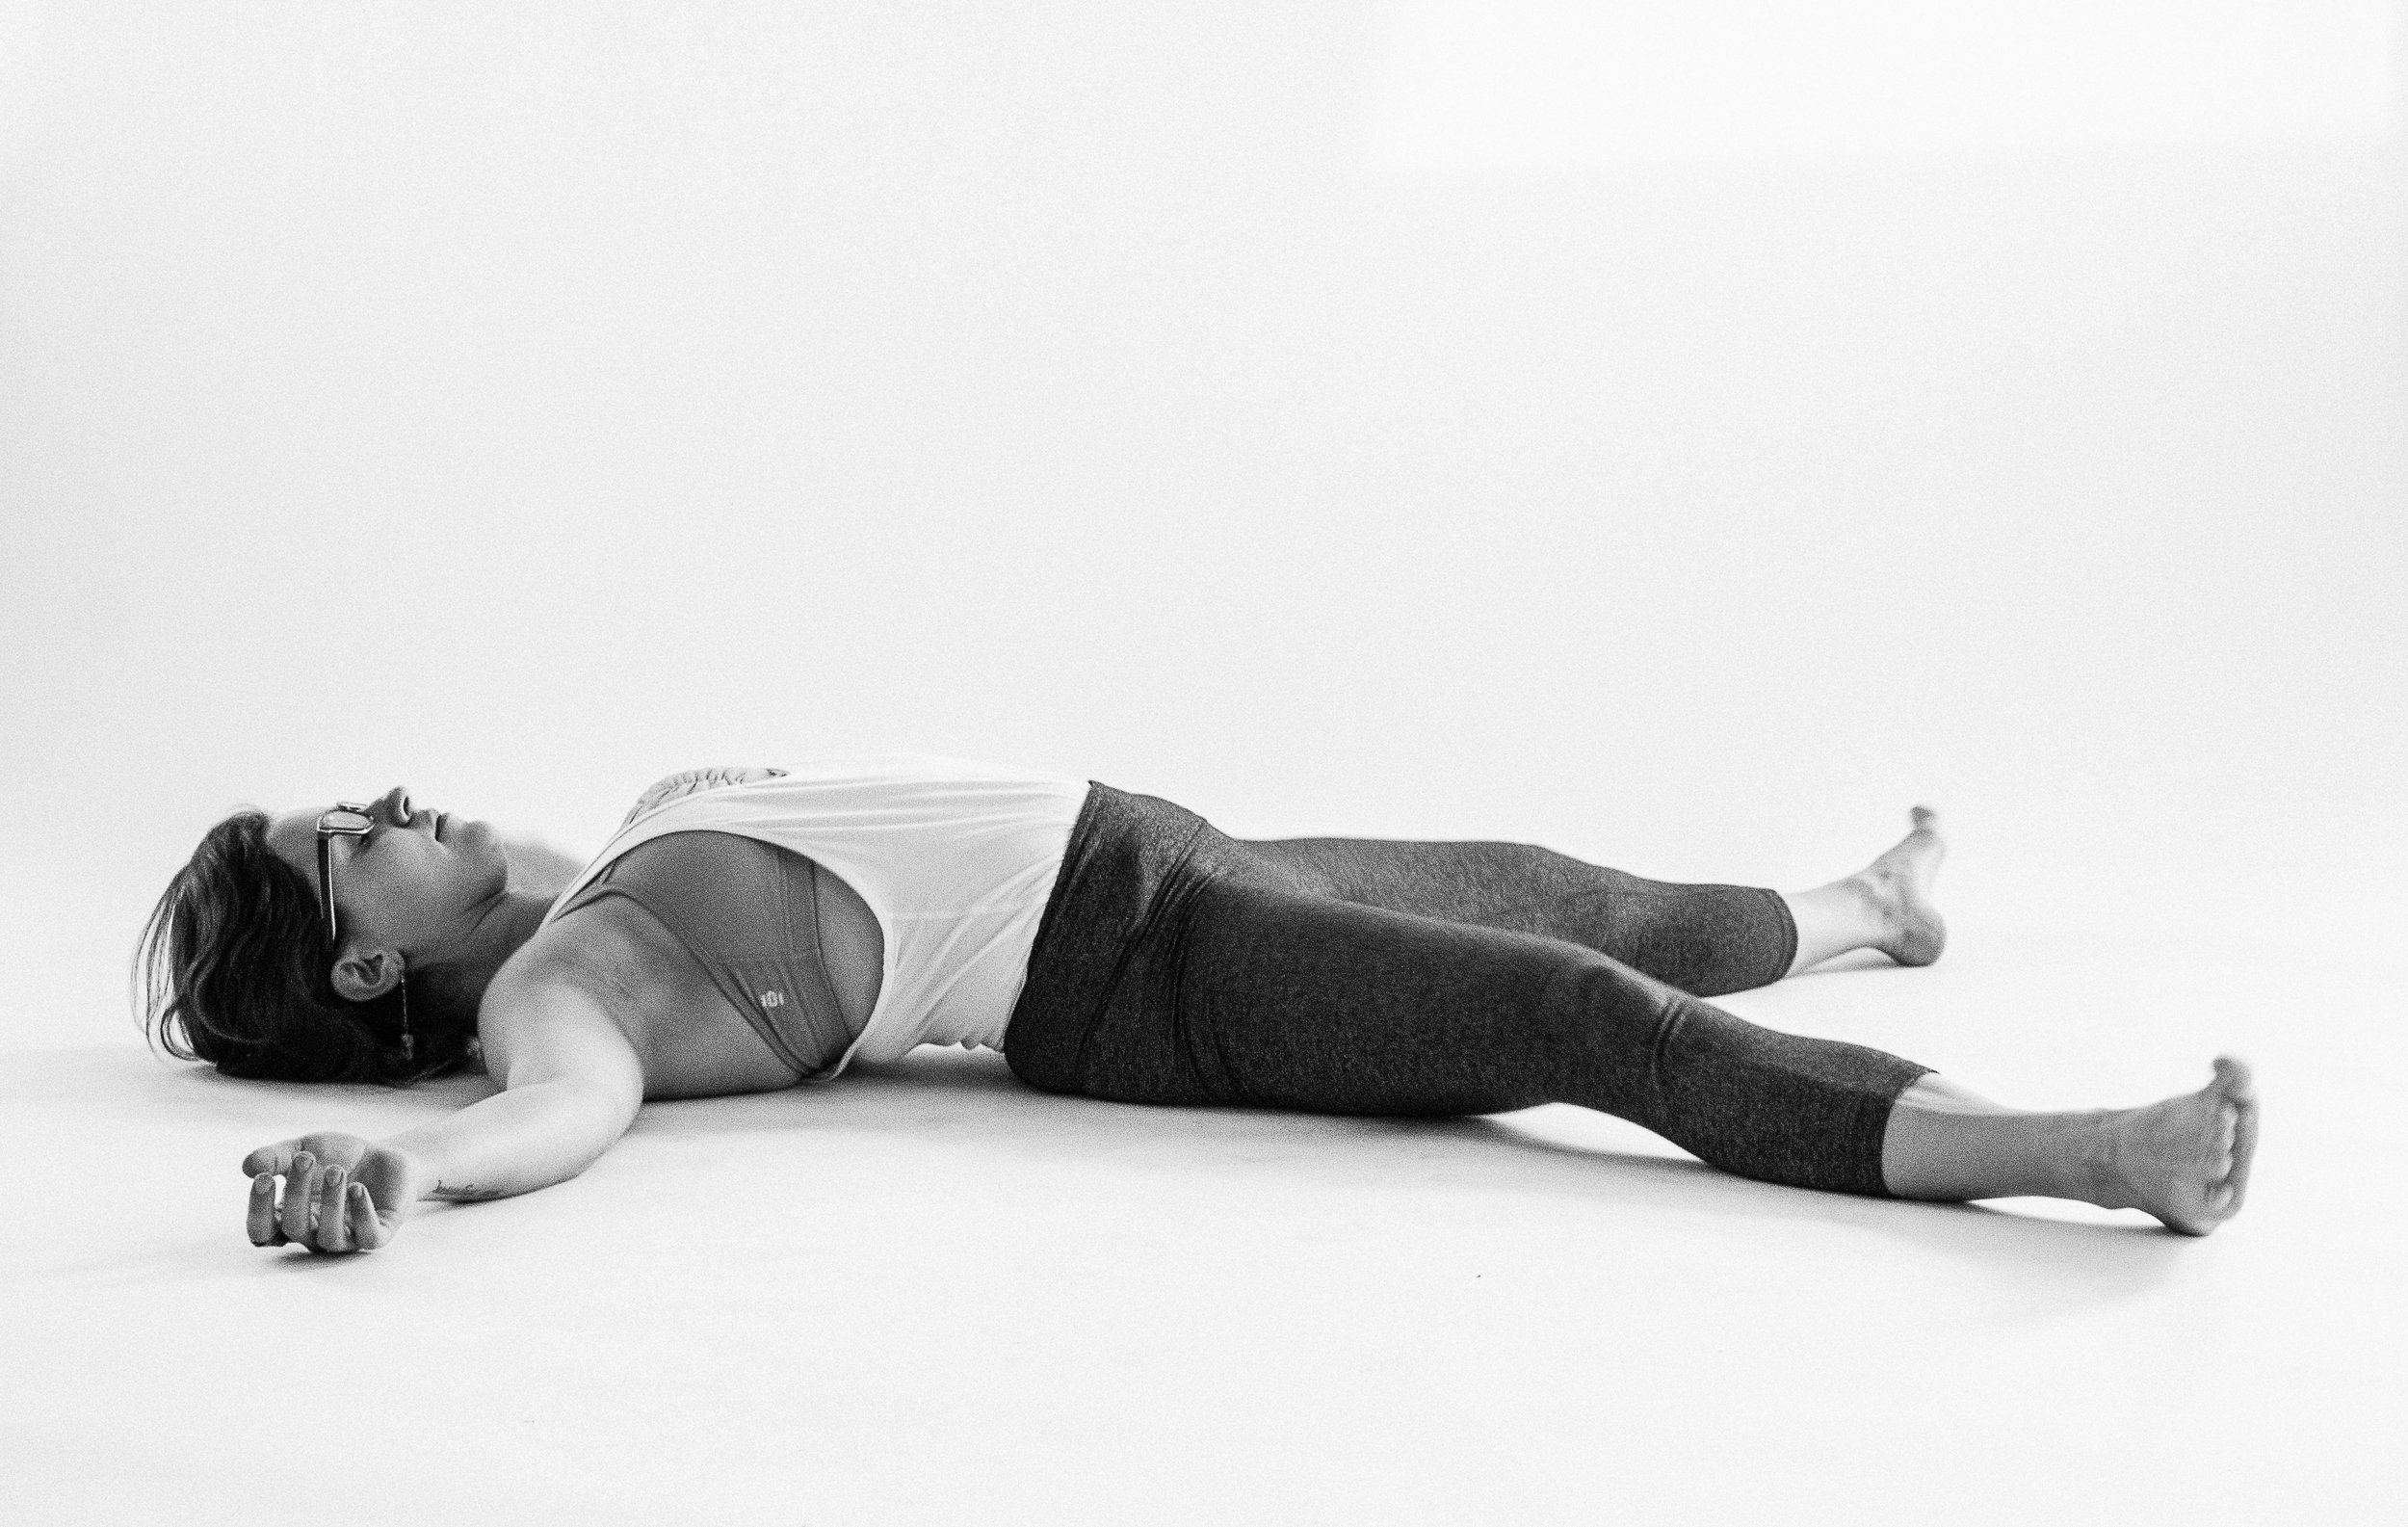
Savasana is the most important—and perhaps, the most difficult—pose in yoga. While it may appear that someone in savasana is simply setting up for a nap, the goal is not actually to fall asleep—rather, savasana intends to mimic the restful effects of sleep by rejuvenating the body, mind, and spirit while the practitioner remains conscious. Since we are not distracted by sensory sensation in this restful position, we are perfectly prepared to lie in quiet awareness of our breath, of our mind, and our humble presence. Without attaching any judgment on to our pattern of breath or to any thoughts that may arise, we may simply be conscious of them.
Why do we practice savasana?
Savasana is a perfect place to pause and find some peace before yoga, to settle our minds and bodies, to get ourselves into a quiet space, setting the tone for our practice. After asana practice, it is so important to take savasana—savanasa is where our bodies make sense of everything that happened throughout practice. This is the time that we can integrate any new sensory information throughout our bodies—where we can soak up all the goodness of practice and let it sink in. It is also an exercise in calming the nervous system, and just like any muscle in our body, the more we can train our brains to find quiet—to slow down and simply notice things the way they are—the stronger our brains and nervous systems will be at mimicking the same quiet, stillness, and calm throughout the rest of our lives.
Savasana may help…
• Decrease your heart rate • Lower your blood pressure • Alleviate muscle tension • Lessen anxiety • Heighten your ability to concentrate or focus • Increase your energy levels

How do I get there?
- First, lie on your back. Lay your feet outstretched from your body about hip-width distance apart, with your arms outstretched a few inches away from your side body, palms face up.
- Let your toes relax to the sides (your feet may rotate outwards slightly).
- Slightly tuck your tailbone under to lengthen your spine.
- Tuck your shoulder blades underneath your body to open across your chest.
- Slightly tuck your chin in to keep the back of your neck long.
- Close your eyes.
- Relax and soften everywhere that you can in your body.
- Release any breathing technique you may have been using in class—breathe naturally.
***Note: comfort is essential in savasana—find whichever variation of savasana is the most relaxing to you, so that it will be easier for you to avoid distractions.
If this position is uncomfortable, you can:
- Keep your upper body the same, but bring the soles of your feet together and let your knees fall wide
- Place the soles of your feet mat-width distance apart and rest your knees together (helps if you are experiencing lower back discomfort)
- Place a bolster under your knees (also helps with lower back discomfort)
We hope this helps you better understand the concept of savasana. Please feel free to comment with any further questions. And let us know if you have something you would like to see featured in Foundation Friday!

Guest Teacher Lisa Cohen


Yogalife Studios South is excited to welcome guest teacher Lisa Cohen, joining us from Arizona.
Lisa will be leading Melissa's Ashtanga class this Sunday June 29th at 12:30pm.
A little bit from Lisa:
Yoga came into my life when my father and sister took me to their Ashtanga yoga teacher, Anthony "Prem" Carlisi, in 1998. I did Primary series, all of Primary series in my first class. I couldn’t move after class or the week after. I was humbled. I knew that I would practice yoga for the rest of my life. I didn’t know that I would teach, but Prem passed the torch to me when he moved away. After 15 years on the mat, I am still a lifelong student, still humbled and still in-love with the Practice.
Yoga opened me up to many ways of seeing and learning, communicating and growing. Yoga is opening, loving and evolving. Yoga is an ego corrective experience. Finding yoga has helped me practice gratitude everyday in every way.
My class is appropriate for all students willing to try something new and step out of what they might think is possible, ordinary or routine. With guidance and love I try to challenge each student while nourishing the body with breath and awareness and clarity of alignment.
To learn more about Lisa visit her site www.flowinwithcohen.com See you Sunday!

Essential Cyclist Asanas


This month we are joining along in the YEG celebration of cycling! As yogis, we know how incredibly essential it is to honour our bodies with the right movement, finding balance after rigorous activity. Yoga, in all its magnificence and splendour, is the perfect compliment to pretty much anything; give me a side of asana before and/or after a long ride and I am a happy camper!
Yogi and endurance athlete Josh Schrei shares the following:
Pedalling long hours astride the saddle with the neck up shortens the spine and causes tightness in the lower back, sacrum, and hips. The neck and jaw can lock up, too. Good posture and stretching will help diminish these after-effects of serious rides.
First, look at your posture in the saddle. Focus on lengthening the spine—be conscious of keeping space between the shoulders and neck. Also, lift the navel to engage the lower abdomen. This will keep the support in your core to protect your lower back.
Second, do these four yoga postures every day to stay loose and maximize your potential on the bike.
1. Cat/Cow
Cat/Cow brings length to the spine in both the forward- and back-bends, working out stored tension from cycling.


2. Downward Facing Dog
Downward dog will not only open the lower back, it will also strengthen it, giving you structural support when you’re on the bike.

3. Chair Pose Into Forward Bend
Like Downward Dog, this pose alternately strengthens and opens the low back and hips. It also lengthens the upper spine.


4. Plow
This pose will open up the whole spine, particularly the sacrum at the base of the spine.

adapted from outsideonline.com
What are you favourite post-cycle stretches? Connect with us on Facebook, Twitter and Instagram. Happy riding!

Poses to Inspire Gratitude

Lately we've been sharing how and why we feel thankful. Gratitude is indeed something to practice, just like the different facets of yoga. You can infuse thankfulness into every part of your practice, from meditation and breathwork to asana. Perhaps think of your next sun salutation as a burst of thanks for life or your next balancing pose as an homage to the steady, rooted earth.
The shapes we make with our bodies can reflect a deeper reverence; an offering.
Here's 5 poses you can incorporate on your next visit to your mat. Remember, although you may do these poses every time you practice, it's the intention behind them that creates the power.
1. Balasana/Child's Pose

Balasana is a beautiful pose to not only initiate practice but to continuously come back to throughout. With your forehead rooted into the earth and your arms stretched long, you feel grounded, safe and connected. You can pour your heart into your mat; your thoughts into stillness. Your body is ready to receive and you can allow gratitude to flow through you as you either create or reflect on your intention.
2. Adho Mukha Svanasana/Downward Facing Dog

Adho Mukha Svanasana may be thought of as your home-base posture, allowing you to connect between poses and re-establish your breath and intention. You simultaneously pour your heart down as you breathe into and illuminate your back body. With hands and feet rooted to the earth, you are stable and strong. As strength and serenity play off of each other, you can channel your energy towards gratitude.
3. Virabhadrasana II/Warrior II with Variations

Our warrior postures connect our strength and softness. Whether held for longer periods of time to define and articulate the alignment or used in a radiant, dynamic flow sequence to move energy and open the long lines of your body, warrior poses allow us to swell with gratitude in their nature of balance and beauty.
Acknowledging what you’re thankful for can lead to a happier, healthier life, just like a regular yoga practice can.
Play around with infusing the two and let us know how you feel!

The Science Of Vinyasa


The following is an article from Zoran Glamoclija, the man offering The Science of Vinyasa this weekend at Yogalife Studios South. Zoran will share Learn how to utilize the energy that is constantly emanating from the nervous systems. Advance through your practice and direct the flow of energy towards greater awareness and progress!
The Science of Vinyasa: Re-Structure and Re-define
1. Adopting beliefs, personality traits, and behaviours through absorption while growing into adulthood
Do you remember, as a child, when you couldn’t help but repeat all the silly things you heard from your parents/television? At the time, it was all so innocent. It was all so seemingly harmless to mimic the voices and styles of our favourite characters on TV, and to repeat swear words with a huge grin when father hurt himself repairing something. This kind of adoption is natural; it’s the way we all learn to absorb information so that we can understand concepts. This understanding indubitably leads to developing certain behavioural and personality traits. And, over time, after we have practiced rehearsing how it is to be “cool” in front of the mirror, all of those moments of practice turn into habits; creating sub-conscious tendencies.
2. Recognizing the process of absorption
We continue our lives for quite a period of time not really recognizing how we have set ourselves up for future decisions and reactions to circumstances. We usually think the way we respond is based on our own personality and unique method of inquiry to whatever dares to be confrontational, or inquisitive. However, let’s take a look a little closer with what has been stated above.
If the innocent and naïve practices of our youth have become sub-conscious habits, that means that we are operating from beliefs and traits that really aren’t ours, without even knowing it.
They are given to us at a time when we are in a mode of absorption. So, what does that say about our unique personality and behaviours? It means, it is a construct that we, personally, have not consciously constructed through awareness. Thus, once such awareness is exercised, the nature of our energy is revealed; namely that, scientifically speaking, we must have a negative polarity which draws ideas, concepts, beliefs, etc. inward so that we can practice outwardly expressing what it is the external world is composed of. And as we know, some parts of society love expressing that ‘the world is our oyster’. At this point in a child’s life, when he/she is steadily growing into a teen and young adult, absorption begins to slowly decline while outward expression increases. Remember earlier about the idea of not really recognizing how we set ourselves up for the future? Well, when we believe that we are confident with how well we grasp ideas and concepts, naivety continues to operate, bringing us into a future that sometimes seems to have happened without us wanting it to. This time our outward expression becomes the practice and we add to our beliefs, behaviours, and personality traits of what it means to be active in a community. Thus, as our beginning stages were to absorb traits, our later childhood/teen/young adult stages are adding traits to what we have absorbed without bringing awareness to the fact that the first traits were not ours to begin with.

3. Yoga and the process of re-structuring and re-defining
What can be done about all the habits that have been created from childhood that now operate sub-consciously? How can the imbalance between all that has been absorbed and all that has been expressed equalize? What am I even talking about?
The answer to all of those questions is Yoga. There is a literal re-wiring that occurs when yoga is practiced regularly.
Remember that one time in pigeon pose when suddenly you got this ridiculous rush of frustration, anger, sadness, and glimpses of moments of your childhood? Yeah, I don’t really either, because really no one wants to remember traumatic experiences. Well, in case you have, those ‘emotional releases’ are coming from your nervous system. When we target areas of our body, a sensation arises, which we classify as pain or discomfort, but what is actually happening is that the muscles have been torn in micro-segments which allows for the nerve endings to release whatever energy was stored in that area. Because our brains are fantastic machines, they pick up the energy signals and interpret them. Each one of us is different, so we will interpret the sensation in multiple ways. I know I’ve been told repeatedly to focus on a rhythmic breath, but why? Here is why.
When you consciously control your breath in a rhythmic rate you active the parasympathetic nervous system. This increases serotonin and begins to calm the brain during fight of flight mode/the activation of the sympathetic nervous system. So, as energy is leaving the nervous system through whatever area of muscles are targeted, simultaneously new nerves are being created to support the higher levels of serotonin that are produced from the conscious breathing.
As the restructuring is occurring from releasing pent up energies with happy fresh energies, it is also necessary to redefine how it is you operate with your body. Instead of not knowing the impact the adopted beliefs will have, you can fully know and be aware what impact a yoga practice can have on your entire being because the balance between energetic release and circulation pulls your mind to focus in on what is occurring during the yoga practice.
4. Acute awareness and dynamic forces, absorbing and emitting consciously
The more yoga is practiced, the more re-wiring occurs. As you turn every muscle that once was tense and tight into flexible happy strings of goodness, your brain also completely re-wires. This occurs because where ever there are nerve networks in your legs, for example, there are neurological pathways that correlate in your brain. So think about it.
As you release every muscle from the grip of tension and toxins into openness and serotonin filled, your whole body operates on the higher vibes that you consciously restructured into your being. As you practice conscious control and awareness, you will naturally begin to observe how your body operates and switches between positive and negative fields of energy.
Just as the planet has a negative and positive pole, and like the sun, and like the galaxy, we also have negative and positive poles. However, our poles flip much more frequently than our celestial hosts. Tracing back for a moment, when we transitioned from childhood to teen/young adult, we weren’t aware of the pole flips. When you bring awareness to the pole flips, you realize how to utilize the energy of the dynamic forces. Thus, you begin to absorb and emit energy consciously. For example, after a period of time practicing yoga and bringing awareness to the nature of energy from your body/mind/emotions, you find that when someone is acting rude or negative in some way, you don’t react to it. Instead you listen and contemplate, and absorb consciously the way that person was standing, the tone of voice they used, and the nature of language used. Then, you consciously choose to use the energy that was absorbed to inspire a change of heart so to speak, so you express yourself in a way that will aid in their pole flip to embody a more positive outlook. That is the process of having an acute awareness to absorb and emit energy consciously through the faculties of the body.

5. Unity consciousness and functioning subconsciously as a whole being
Just as we all practiced absorbing and emitting ideas, beliefs, and tendencies that turned into sub-conscious tendencies and habits, when we consciously re-write and re-wire those tendencies through the practice of Yoga, we begin to operate from a unified state of consciousness sub-consciously. After all, Yoga does literally mean Unity. That means, that the body will maintain a balance between absorption and emission. This not only occurs with the body, it includes the fluctuating energy in the mind and emotions. Furthermore, when all of these are unified and in balance, wholeness ensues.
At this point it is now up to you to do the work. Practice yoga, and don’t just sit there day dreaming. Focus on the breath, make it rhythmic, and talk to your body. Tell your body that changes are being made for the better. Tell your body to relax and allow the old patterned energies to release to make way for fresh new high vibe charged pathways.
Observe the sounds the body makes, and the movements that occur. The more awareness the better! This way, you learn from a form of existence that holds all the knowledge you need to truly know of yourself.
That’s enough out of me for now! Hope you enjoyed the read, and see you on May 17th for The Science of Vinyasa!
Click here to register, space is limited.

Wring Out the Winter


You may have noticed a little twist in your yoga practice here at Yogalife lately. It is by no mere coincidence that many of our instructors have been focusing on twisting poses in practice—as the seasons turn, so should our bodies.
Spring is an excellent time for detoxification and cleansing, clearing out the old to make room for the new.
Just as we might spring clean our houses—scrubbing out the dust bunnies and packing the warm, thick layers away—it is also important to spring clean our bodies, removing the heaviness and slowness of winter to make room for the lightness of the warmer months (and since we claim residency in Edmonton—home of the long winter—we have plenty of work to do!).
In yoga, a great way to aid and promote cleansing the body is through twisting postures. Similarly to the way you might wring out a wet washcloth to squeeze out all the water, twisting our bodies helps to “wring out” our internal organs, facilitating a more efficient cleansing process.
Here’s how:
Twists temporarily restrict the flow of blood throughout the body. When we release a twist, our now freshly oxygenated blood floods through our veins. This enhanced circulation helps bring fresh nutrients and oxygen to our internal organs and provides them with the tools they need to do their job optimally. Spring is the best time to support the liver, as it is our body’s main vehicle for detoxification. If you subscribe to traditional Chinese medicine, this is the time of year where the liver is the most sensitive—prime time for us to focus on keeping it clean and working like a champ.
The compression of internal organs through twisting helps to move along stagnated digestion and bloating, promoting the cleansing of our digestive tract for a happier, healthier belly. For anyone who has struggled with digestive upset, twists—alongside strong pranayama, or breath—can help to ease discomfort and facilitate better digestion and absorption.
In addition, deep breathing has a cleansing effect, as we are able to bring in the new—fresh oxygen—while releasing the old—stale, depleted carbon dioxide. In combination with deep twists, long inhales and exhales further aid the body in its gentle purging process. In whichever variation of a twist you might practice, try using your inhales to lengthen your spine and broaden your chest, and your exhales to gently bring yourself into a deeper expression of the pose.
Alongside their detoxifying effect, twists can also aid in properly aligning the spine, releasing the muscles and pain or discomfort through the spine all the way down into the hamstrings, increasing or maintaining range of motion in the back body, toning the abdominal muscles, and helping to release tension, stress, and anxiety stored in the chest, shoulders, and back.
You might twist from your feet, the floor, atop a bolster, or even balancing on your hands—different poses and variations make twists accessible to every body. Do you have a favourite twisting pose? Do you have any spring rituals or routines for cleansing the body? Let us know!

The Only 10 Guidelines You Need to Practice Yoga


Adapted from Hilary Phelps, MindBodyGreen
Whether you're just starting into your yoga practice or a seasoned veteran, it's nice to check in with a simple set of guidelines to remind yourself why you're practicing. Personally, I always like to remind my students that we call it just that: a PRACTICE! It is truly meant to be fun and simple and by no means perfect or stressful. Here's a list of guidelines to ensure the most enjoyable experience your mat can provide.
1. Arrive a few minutes before the start of class.
Give yourself enough time to select your space and get settled on your mat. If you're feeling rushed or stressed as you come into the studio just bring awareness to that and take some extra deep breaths.
2. Listen to your body.
Each and every yoga class is yours. The person on the next mat has a different life story, so make sure you do your class and not theirs. Beware of judgement and comparison, your practice will go exactly the way it was intended to!
3. Remember that every class is different & you're different in every class.
Every practice will be different and each time you arrive on your mat there will be new opportunities and challenges! That practice you had yesterday or last week is not the practice you may have today. I often find my mat is an indication of where I am in my day. If I'm scattered and distracted, it will show up in my practice.
4. Be present.
No phone, no computer, no mental grocery list making. This is your time. Enjoy it.
5. If you're new or have an injury, let the teacher know.
This awareness helps them teach as much as it helps you practice. Know your limits and stay within them. NEVER practice from a place of physical pain.
6. Have fun. It's just yoga!
Who cares if you fall? It makes no difference if you choose child's pose over downward dog. (Also, see #2 above.) Many poses share similar benefits so you don't need to force yourself into anything. By engaging in mindful breathing you are practicing yoga!
7. Smile.
This is your time. That's a really good feeling.
8. Focus on calming breaths.
There are some days where I lay down for the final relaxation and my mind is still racing. When this happens, I don’t get up and leave. Instead, I count my breaths in and my breaths out, each to a count of six. My mind isn’t completely still, but it’s better to focus on calming breaths than remind myself, over and over, of a task I have to complete later in the day.
9. Find a yoga style that you enjoy.
There are different types of yoga: heated, traditional, vigorous, and restorative. One class will hold a pose longer, building strength, while others flow through a sequence quickly, elevating your heart rate. Find one that you enjoy or that perfect weekly mix. It's about consistency, not style.
10. If you don't like one style of yoga or you don't click with a certain teacher, find another one.
There truly is a practice for everyone. Each teacher is unique, with a distinct teaching style, voice and practice. For me, yoga channels my busy mind and allows me to tap in under my skin. I leave feeling renewed, inspired and connected. When I practice with my regular teachers these outcomes are the most apparent because they guide me so effortlessly.
From contentment unsurpassed happiness is obtained.
Patanjali's Sutra 2.42
Keep practicing, keep smiling, keep ON!
35 Day Yoga Tour Challenge: Tips and Tricks


With our next 35 Day Yoga Tour Challenge kicking off on February 17, we wanted to share some tips and tricks to not only ready you for this amazing undertaking, but to ensure you get the most out of it! You can learn all about the challenge here but essentially by signing up at Yogalife Studios South or North you are committing to completing 30 classes in 35 days. 10 out of 30 classes have to be Non-Hot Flow style classes and workshops count for 2 (there's your first hot tip!)
We want you to see what we have to offer; to get out of your comfort zone... or maybe more in it with a restore and renew class; to explore different styles and teachers while submerging yourself in your practice.
If you've never done a yoga challenge before it can seem a little daunting but it's all about intention and integrity (and maybe a little time management!) Know that you deserve a daily practice and the benefits show up almost immediately. It becomes this thing that you crave... you NEED! To commit an hour to yourself (almost) every day is a simple, beautiful gift.
TIP 1: SET AN INTENTION FOR YOUR CHALLENGE:
Know why you're on your mat.
Connect with that purpose every time you arrive.
Mindfully choose how you are using your energy.
Feel guided by your own fire.
find more info on intention here!
Every Yogalifer wants to support you in this journey. We have all completed challenges of our own and thrive off seeing others come down this path. You will get to know us from our classes, workshops and interactions around the studio. In yoga we call this KULA... community!
TIP TWO: LET EVERYONE AROUND YOU KNOW YOUR GOALS
Reach out to your instructors and fellow yogis.
Share your intention and goals for the challenge.
Connect with fellow yogis to make yoga dates.
Celebrate your excitement with EVERYONE!
As you get into the groove of this near-daily commitment, make sure you are taking the proper steps to stay healthy, rested and hydrated. We are offering a juice cleanse option along with the challenge; an amazing way to compliment your practice and heighten your health. In general, staying hydrated and choosing to practice without pain are two of the most important things you can do... always!
TIP THREE: TAKE CARE OF YOURSELF NO MATTER WHAT
Always listen to your body and choose rest (in your practice AND life) when you need it.
Drink water like it's going out of style.
Eat clean! Honour your body and give yourself the upper hand for this challenge.
Educate yourself on your options: juicing, vitamins, cleanses.
I'll never forget my first 30 day hot yoga challenge... there were days that I couldn't fathom leaving my bed, let alone PRACTICING! So those days I would take all the child's poses I needed, an early savasana, and made sure I communicated to my instructor that I would be that girl who looked half asleep but was definitely breathing. I was forced out of my comfort zone because I had made a commitment to myself. There was no bowing out for me and holy heck did it pay off. I think it was around day 9 that I actually saw colours brighter... stuff tasted better, sounded better, made more sense and fed me in ways I never knew imaginable. The best part of the whole thing...? I DID IT!
Once you're in it, you're IN IT.
We can't wait to see all your beautiful faces in our classes, filling up our hallways and our ears with your excitement and intention. If you have any questions or hesitations around this commitment, drop us a line! info@yogalifestudios.ca
“Be a lamp to yourself. Be your own confidence. Hold on to the truth within yourself as to the only truth.” ~ Buddha
How-To: Full Vinyasa Flow

How To: Full Vinyasa Flow from Yogalife Studios on Vimeo.
- Step 1: From downward facing dog, bring yourself forward into a plank position on an inhale breath. Shoulders over the wrists, legs strong and straight, core engaged. Be sure not to collapse through your low back.
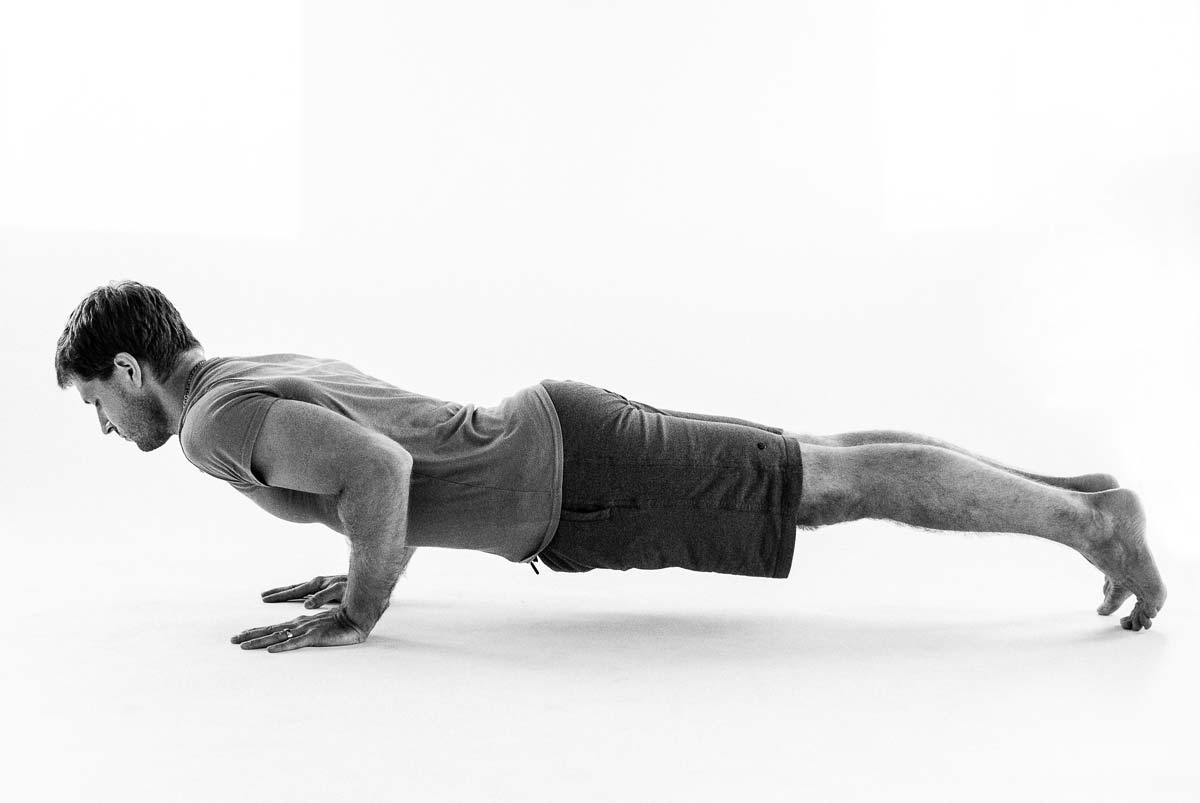
- Step 2: On the exhale, lower yourself to chaturanga, keeping the elbows hugging into the side ribs, bring your upper arms parallel to the floor while maintaining the strength in your legs and core
- Step 3: On the inhale lift into upward facing dog, rooting down through the tops of the feet, lift your chest by straightening through the arms, sliding the shoulders back to open the heart.
- Step 4: On the exhale, tuck your toes under and move back into downward facing dog.
A Bit About Vinyasa Yoga...
adapted from Shiva Rea/Yoga Journal
Vinyasa yoga teaches us to cultivate an awareness that links each action to the next—on the mat and in our lives.
Like rhythms in nature, a beautiful dance, or the notes of your favourite song, the sequence of vinyasa unfolds with harmony and intelligence. The progression and interconnectedness between movement and breath coordinates in such a way that you inherently move through your meditation (and it moves through you).
"Vinyasa" is derived from the Sanskrit term nyasa, which means "to place," and the prefix vi, "in a special way"
Yogalife Studios offer specific Vinyasa Flow classes or you can find this style of yoga presented in many of our flow classes. To learn more about specific classes click here!

Pose of the Month: CHATURANGA DANDASANA

Yogalife Studios are so thrilled to see all these yogis, new and old, hitting their mats like it's going out of style. Whether you're new to the practice or a seasoned vet, chaturanga dandasana (or low plank/push-up) is one of those tricky poses that is easily done incorrectly. Why? BECAUSE IT'S HARD!
This pose takes strength, breath, alignment and ZERO ego. It is truly one of those poses that you need to master the modified version before attempting to move on. Your shoulders will thank you!
Here are some tips to keep your chaturanga strong and healthy:
Remember...
- In order to do the full version of the pose, you must have sufficient arm, shoulder, and abdominal strength. These parts work together in a complicated way to create the perfect alignment here.
- If you don't have the strength to do the full version of this pose, do it from your knees! Let go of the ego and listen to your body.
- Hands under elbows
- Elbows under shoulders
- Abdominals and low ribs pulled in; core engaged
- Thighs pushing up
- Heels pushing back
- Hug all your muscles into the midline of the body
- Roll WAY forward on your toes. Even more than you think you should. (This ensures you will lower down with your arms in a 90° angle.)
- Now begin to lower down until your arms form a 90° angle and stop just at that point.
- Keep your core VERY engaged just as in plank—abdominals and ribs really pulled in
- HUG your elbows into the sides of your body
- Keep the tops of your shoulders pulled back away from your ears and pointing straight forward, not drooping down.
- Imagine that you’re trying to make your clavicles SMILE. In other words, broaden through the chest. “Smile your clavicles”.
Adapted from Mind Body Green

200 Hour Vinyasa Flow Foundational Teacher Training

Teacher Training Information Session from Yogalife Studios on Vimeo.
Yogalifers Brandon and Brittany talk about our upcoming teacher training offered in May and the two info sessions leading up to the training. Whether you aspire to teach yoga, or are simply looking to deepen your practice, a yoga teacher training is an incredible learning experience that will change the way you look at yoga and yourself.
January 25, 6-8pm at Yogalife Studios South February 1, 6-8pm at Yogalife Studios North

3 Reasons Why You Need a Restorative Yoga Practice


Adapted from Mind Body Green
Restorative yoga has a wonderful way of allowing our entire physical body to relax. This practice is an “active relaxation” class where we purposely support the body in yoga postures with props so we can stimulate and relax the body towards balance. Muscle and joint tension melts away, the endocrine (governor of hormones) system will be restored and any residual stress in the nervous system washes away. We are left with better digestion, energy levels and a good overall sense of well being.
I asked the class to set an intention to focus on ahimsa during their practice that evening. I asked them to imagine, with every inhale, filling up with a bright light, or an energy, that represented non-violence and loving kindess. With every exhale I encouraged the class to release everything else that wasn’t serving them right then in that moment, to allow for focus and attention on ahimsa.

Yogalifer Emily McNicoll shares her personal insight on this nurturing practice:
"My passion around restorative yoga lies not only in helping people heal their body and mind but to provide a sacred experience in which they can shine a light on the shadowy sides of the self and ultimately feel more comfortable in their own skin."
Our upcoming "Rest & Restore" workshop, hosted by Emily, is full to the brim! If you would like to stay in the loop for the next workshop please email us at info@yogalifestudios.ca

How To: Modified Vinyasa Flow

Step 1: From downward facing dog, bring yourself forward into a plank position on an inhale breath. Shoulders over the wrists, legs strong and straight, core engaged. (*be sure not to collapse through your low back)
Step 2: On the exhale, lower your knees to the floor and un-tuck your toes. Keeping your elbows hugging into your side ribs, lower your chest, and then your hips to your mat.
Step 3: Using your core, inhale to lift your chest away from the floor hugging your shoulder blades together.
Step 4: Root down through your palms, and on the exhale, lift up onto your hands and knees, tuck your toes under and lift your hips back to downward facing dog.
Modified Vinyasa Flow from Yogalife Studios on Vimeo.

Learn To Fly


10 Messages Your Body May Be Sending You on Your Mat - Are You Listening?!?!

Adapted from Karen Fabian:

"If it doesn't challenge you, it won't change you." "You are beautiful and perfect just as you are." These are just a couple of concepts that I often teach on. Please read on to discover how you can learn to love yourself and your practice even more.
Sometimes when we practice yoga, it’s all we can do to get to the mat. We start practicing, our body is tired, our minds wander and we’re distracted and not focusing on the mind/body connection. Even in the best of practices though, we may also feel somewhat disconnected. We’re dealing with information overload: between social media, the news, our personal schedules and any pains in our body that may have disrupted the passage of messages from our heads to our body.
It’s important to hear the messages our body is sending. This can be the difference between feeling good and feeling great. Sometimes our body is sending us messages but we’re not clear on what to do because we’re new to the pose or to yoga in general.
So, inspired by these thoughts, here are 10 things that may pop up in your sensory body that might be worth listening to:
Is Downward Dog supposed to hurt my hands so much?
From a teacher’s perspective, this is one of the most common messages I’ll bet your body may be sending you, but you’re not sure what to do. If you’re new to yoga and feeling this, you’re probably wondering how anyone could enjoy this pose.
Bend your knees and leverage pushing down into your palms to literally rebound up the sides of your body, pushing your hips up and back. Remember to keep your knees bent a little so that you can draw the weight out of your hands and into your legs. Do this with great awareness so as not to overstretch the hamstrings or create tension in the low back or shoulders.
How can I stop my arm from shaking in Side Plank?
Here’s another pose-related message that I frequently see students struggle with while in class. Turning to the side puts tremendous pressure on the shoulder. Unless the shoulder is stacked over the wrist and/or the knee is down, you may experiences shaking in the supporting arm. Take this modification and you’ll experience less shake while building more strength.
It’s so hard to hold this Triangle Pose. This can’t possibly be right. Triangle pose is a stretch for the inner thighs and sides of the body but it’s hard to experience that sensation if you’re hanging over the front of your leg. Feeling good in this pose is additionally complicated by placing a block in front of the foot instead of behind it. In order to create the alignment of your joints needed to be comfortable, only bring your hand down as far as you can keep the upper body aligned with the front thigh. With this alignment, you’re not fighting gravity and can experience great stretch.
Why is it so hard to reach this block? This is hardly helpful. I often see people grab a block and the lose alignment by placing it too low or struggling to reach it with their fingertips versus using two or turning it on the higher end. Blocks are meant to give you greater stability not create more struggle. Listen to those messages and use more or turn them on their shorter sides.
My hamstring feels like it’s going to pop right out of my body. In our zeal to create flexibility, we may sometimes ignore the messages our body is sending us to let us know that we’re pushing too hard. Muscles should feel stretched evenly throughout the muscle but not to a point where we feel a strong sensation at the beginning or end of the muscle. Bend the knees or make other modifications to the part of the body in question to lessen this sensation.
I can’t breathe. Heated power classes can sometimes result in this feeling and can create anxiety for students. Even in non-heated classes, a crowded class or one where a student is experiencing anxiety for other reasons (yoga-related or otherwise) can trigger a sense of panic. Take a moment to listen to this message. Rest in Child’s Pose. Leave the room for a breather if you feel you need a break but do so mindfully.
I’m so tired. Sometimes, our practice helps us realize we’re really tired. While this seems obvious, as people often complain all the time about how tired they are, this is a deeper awareness; one that only comes after some time on the mat. It can be deep to the level of the bones or may just be an awareness that our mind is constantly moving.
During practice, modify and take time to rest. Give up the urge to keep up or compete with those around you. Meditate at the end of class on what else is going on in your life that could be contributing to this feeling.
Why am I having such a hard time keeping up? In any class we may feel the urge to keep up with those around us. In the midst of doing this, we may feel discouraged and start hearing voices that tell us we’re not good enough or ready for yoga. In these times, we need to practice compassion for where we’re at in our practice. We need to look for ways to make the practice fit our body as it is right now and let go of the need to compete.
I bet I could do this pose. Just as we need to allow for rest and compassion, we also need to listen to that inner voice, as small as it might be, that we could actually do the pose that is being presented. I know lots of students who think they can’t do a particular pose because they’re new, or not flexible or not strong enough. It’s only through trying that we will ever know. Bring your healthy attitude and see what’s possible.
I really feel good. Sometimes it’s easy to look at the glass as half full. We wanted to do a particular pose; we wanted to feel particularly graceful and did not. But sometimes, in the depths of our final rest, we may hear a voice that says, “ I feel great.” This is the magic of yoga.
Listen to that voice and from it, draw strength. You are beautiful, you are strong and you are perfect just as you are.


Melissa Talks About Ashtanga Yoga

 Ashtanga Yoga is a lineage of Vinyasa Yoga developed by Pattabhi Jois and is a methodology to cleanse our body of impurities. Through the use of Tristana, we hope to cleanse 3 areas of our body.
1. Asana - the physical postures to clean our body.
2. Pranayama - breathwork to clean the energy channels in the body.
3. Drishtana - the idea of focus, used to cleanse the brain and nervous system.
Ashtanga yoga follows the lunar cycle; as our bodies are composed of 70% water, and the moon governs the tide, by practicing according to the lunar cycle, Ashtanga hopes to reset the body to a more natural state before we implemented artificial lighting in our society.
"The point behind Ashtanga, is that if you practice every day, your practice will eventually change." - Melissa Perret
Ashtanga yoga is accessible to everyone, but be aware it is challenging! It's a humbling experience, as the postures initially seem impossible, but with time, patience, and the ability to let go of the exterior, the postures will find themselves into your practice, and your ego will begin to dissipate. For Melissa's registered yoga class, beginners are welcome, but we ask that all participants come already comfortable with the basic postures of a vinyasa - upward facing dog, downward facing dog, chaturanga etc. We do not recommend attending this registered class if you have no yoga background at all.
"You will immediately see that you have to let go of your ego, as you initially face some very challenging postures, and take a more inward focus to your practice - a moving meditation." -Melissa Perret
Ashtanga Melissa from Yogalife Studios on Vimeo.
Categories
- Wellness 241
- Zen Habits & Inspiration 100
- Injury Prevention & Health 30
- Classes 1
- Yogalife Classes 7
- Prop Specific 1
- Studio Information 17
- Foundation Friday 25
- Physical Health 3
- Yoga Specific 54
- Curated Playlists 2
- Karma Program 5
- Staff Adventures & Journeys 10
- Anatomy & Information 30
- Community Event 15
- YEG Highlight 8
- Instructor Stories 22
- Yogi of the Month 13
- What's Going On 35
- Yogalife Workshops, Retreats & Trainings 37
- Recipe 10
- Relaxation 1
- Mental Health 2
- Workshops 34
- Registered Classes 4
- Pregnancy & Family 1
- Member Stories 5